Bitcoin Core + Lightning + Rails on AWS
Recently I’ve been working on a project code-named Matreon. It’s like Patreon, but for the matriarchy. In a world of increasing online censorship, being able to host your own website and process your own payments really helps.
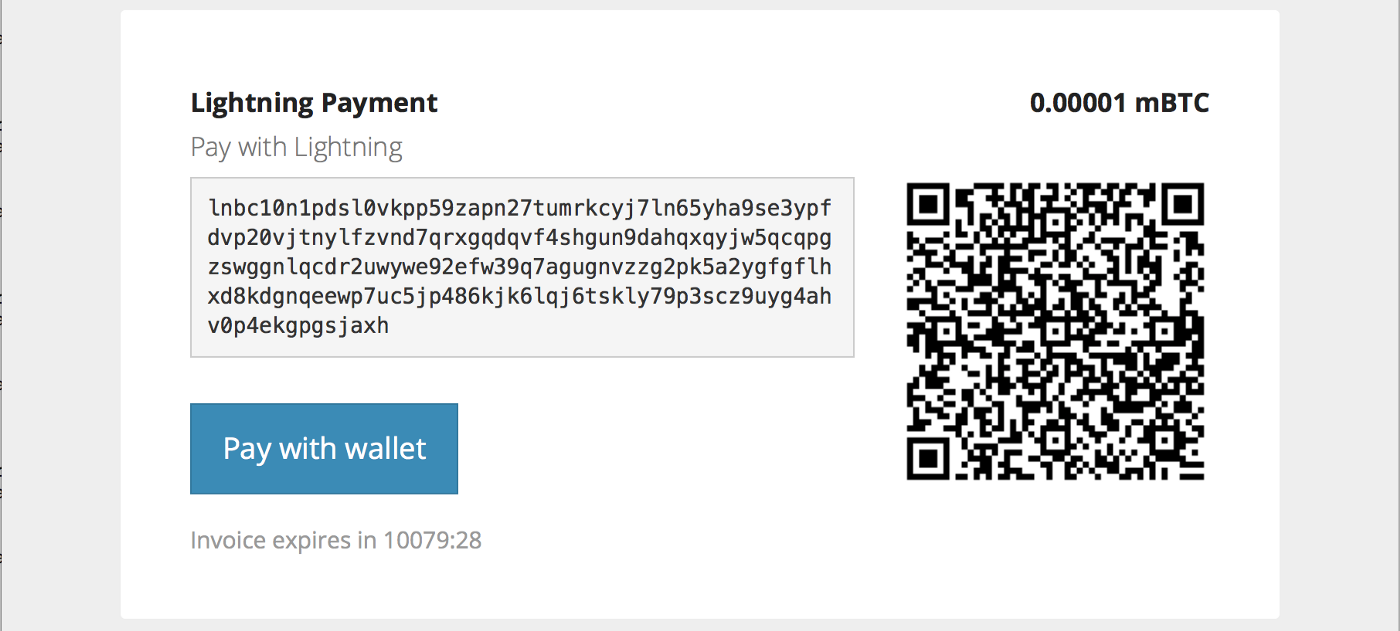
 Step 3: every month they receive an email with a fresh invoice
Matreon is self-hosted, which means you’re no longer dependent on the whims of one CEO or some untransparant content. It uses Bitcoin and the Lightning network, so you no longer have to worry about demonetization policies. I’m working on making it as easy as possible to deploy on AWS, the steps are described below.
Hosting is complicated. It’s always been that way, which explains the success of SAAS companies. Other than WordPress, very few people run anything on their own server. I think that created a bit of chicken-egg problem, where pretty much only the WordPress comunity worked on making that process easier. There are great tools out there, but they’re mostly optimized to make life easier for devops folks or for software developers to deploy their own application. There’s not really a generic easy to use host-your-own SAAS tool.
Current status: quite experimental, you might still lose all your money!
Step 1: Create an Amazon account and obtain a login key
Go to the KeyPairs page of the Amazon Web Services management console. If you don’t have an AWS account yet, click the Create a new AWS account button. You’ll get some free credits, which may or may not be useful here; otherwise expect to spend approximately $25 per month (unless someone helps reduce that).
Only you have access to your server. Amazon will create a key for you that you should download and backup. Without that key you’ll lose access to both your money and your fan database.
 Press the blue button
Enter “Matreon” as the name. Your browser should automatically download and open a text file like this:
 Keys to your kingdom
For now, keep this somewhere save. You won’t need it until there’s money on the machine that you need to take out. Or until you can’t resist curiousity to see what the machine is doing. Or until something breaks.
Step 2: Start the Amazon Cloud Formation wizard
I created an Amazon Cloud Formation template which automates the steps of spinning up a server and installing all the required software. You just need to fill out a small form and perform a few manual steps. It should be about as easy as installing your own WordPress, which people still do.

Click the launch button above and fill out the following form:

- KeyName: the key you just created in Step 1
- Bugs Email: if anything goes wrong on the server, more detailed debug information is sent to the bugs address you should provide. Don’t even think about entering my email there 🙂
- Network: Switch the network from testnet to bitcoin (mainnet) if you’re feeling lucky.
- Prefix: if you really don’t want an https certificate, or if that fails, switch to
http. - Domain: the name of your (sub)domain that you intend to point to this server. It’s used in the emails your server sends out.
- From Email: enter an email address that’s used as the sender for emails sent by your server, such as the montly invoices to your fans.
- SMTP: in order to send email you’ll need to provide SMTP server details. One approach is to get those from your own email provider, but be very careful if the password for that is the same as your email login; if your server is ever compromised, the hacker would be able to get into your inbox. A service like Fastmail lets you generate a password specifically for SMTP, which can therefor only be used to send email, not to read it:
 Make sure your password only gives SMTP access.
Alternatively, and perhaps better, is to use Amazon’s SES SMTP service. They require you to go through a number of verification steps in order to prevent spam.
Click Create, which takes you to CloudFormation management console where you can follow the progress:
 Click on “Matreon” to see more details of the work in progress.
Step 3: Wait… then eat your brain
Downloading the blockchain takes about 25 minutes on testnet and about 4 hours on mainnet. The status should change from CREATE_IN_PROGRESS to CREATE_COMPLETE.
In order to download the blockchain in hours rather than weeks, we use a high performance virtual machine*. Similar to how a sea squirt eats its own brain when it finds a place to stay and no longer needs to swim, you should downgrade to a cheaper machine once the blockchain has been downloaded.
 You may need to refresh the page for the WebServer ID to become a clickable link.
Click on Matreon (the stack name) and look under resources. Click the link next to WebServer i-xxxxxxxxxx which takes you to the EC2 instance management page. You’ll notice the instance type is m5.4xlarge.
Click on the Actions button -> Instance State -> Stop. Wait until the instance is stopped. Click on the Actions button again -> Instance Settings -> Change instance type and choose t2.small.

Finally, start the instance. A few minutes later the hour glass and Initializing under Status Checks should change into a nice green check mark. It may still take few minutes after that before the site is live.
Step 4 — Configure HTTPS (by doing very little)
Configuring HTTPS has always been a major pain. It still is, but for you. For you it just works*. All you need to do is add a single DNS entry, sit back and wait.
Add an A record to point your subdomain to the server. You’ll find the IP address under Outputs.
matreon.example.com. A 18.194.87.12
Behind the scenes the server is waiting until it sees this record. It then instructs EFF’s Certbot to request a certificate, using the domain and email address you filled out before. It also makes sure it gets renewed on time.
*=unless it doesn’t work 🙂
Step 5: Tell the world, profit!
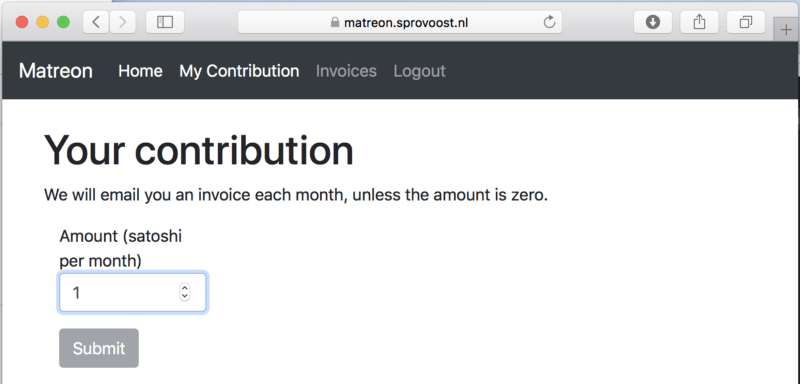
It’s still pretty bare bones, but your fans can now sign up:

If you have your own lightning node somewhere, it helps to connect to your Matron Lightning node. That way your fans hopefully immedidately have a route to the node and don’t need to open a channel first.
The problem with manual invoice payments is that it leads to high churn. Apart from email delivery problems, every time a user makes a manual payment they’re rethinking their commitment. There’s currently no protocol for repeating payments in either Bitcoin or Lightning. I’d like to work on potential solutions.
One simple approach I have in mind is a direct debit system, where the user’s wallet gives another node permission to withdraw up to N satoshi each time period. A merchant would send a message with a payment request (via similar onion-like routing as regular payments, trying again later if the user can’t be reached). The user’s wallet would then wait a certain number of days, where the user can still cancel it, before making the payment.
This is potentially much easier to do in Lightning than with regular Bitcoin, because nodes have public keys and there is a routing mechanism in place. Being behind a NAT might make this more difficult, but that’s another good reason for more people to use Tor.
Login to your machine
First, you need to save that key you downloaded in Step 1. On on macOS, you would open a terminal window (hit Command + Space and type “terminal”). Assuming it’s in your download folder, move the key to the right place and limit access to it:
mv ~/Downloads/Matreon.pem.txt ~/.ssh/matreon.pem
chmod 400 ~/.ssh/matreon.pem
If you get an error that the .ssh doesn’t exist, then you first need to generate an SSH key. Github has good instructions (you can skip the SSH agent bit for now).
Go to the Instances list in the EC2 Management console:

Copy the value next to Public DNS (IPv4). Your username will be ec2-userand you need to tell SSH to use the right key:
ssh ec2-user@ec2-18-194-87-12.eu-central-1.compute.amazonaws.com -i ~/.ssh/matreon.pem
To follow installation progress:
tail -f /var/log/cfn-init-cmd.log
After about ten minutes it will be waiting for the blockchain to download, which you monitor here:
sudo -s
tail -f /mnt/ssd/bitcoin/testnet3/debug.log
After installation and reboot, you can monitor all services:
journalctl -xe -f
Take your profits
So how do you get your money out? I’d like to find a better solution for this, but for now you just have to login to the machine and issue some commands to the Lightning wallet.
You’ll need a Bitcoin wallet to receive the funds with. Have it generate a fresh address and have that at hand.
Let’s see how much money you have:
sudo -s
su - bitcoin
lightning-cli listfunds
{
"outputs": [],
"channels": [{
"peer_id": "020275fd0dea2354e40f6ed789fb5bb9bcad54944e4193315b7166ba6d24e416bf",
"short_channel_id": "1297288:77:0",
"channel_sat": 1,
"channel_total_sat": 100000,
outputs lists bitcoin that is not in a channel. Sending those on-chain funds works like any other bitcoin transfer (with ditto fees):
lightning-cli withdraw DESTINATION_ADDRESS all
For each channel, channel_sat is the number of satoshi on your side of the channel. For the time being, you can’t combine funds from multiple channels, although there are proposals. In order to move those off-chain funds you need to have a Lightning wallet that can receive payments (e.g. Eclair for Android can only send payments at the moment). Use that other wallet to create an invoice with the amount slightly below your balance. Then pay it by copy-pasting:
lightning-cli pay INVOICE
You can’t specificy which channel to spend from, so it’s best to start with the largest amount.
In order to pay you, at least one person must have opened a channel to your server, possibly one of your fans but it could have been anyone. Others would then reuse that connection (i.e. their payment “just works”) or they might open a channel to you as well. Eventually one or more of these channels may end up closed, causing your bitcoin to be split between so called on-chain and off-chain funds.
Automating this would require similar, but simpler, changes than those needed for recurring payments. The assumption is that you have your own Lightning wallet somewhere safe, though not necessarily online 24/7 and not necessarily on a fixed IP. The server would regularly forward off-chain payments to your other wallet. All that’s needed for that is a protocol to route a message to an arbitrary node with “please take my money”.
In addition I set up an ad hoc way to financially support the project: send bitcoin to bc1qcpersad0kxwt8s83uuhrp5rtufllxq77mugj08 and use last 5 digits to indicate a Github issue number. E.g. if you send 100004 satoshi then that goes towards whoever — which could be me — fixes GPG mail support. Please get in touch before sending huge amounts, because that might open a can of worms regarding taxation and such.
Initial Blockchain Download machine
*=i3.2xlarge with 8 CPUs, 61 GB of RAM and a 1.9 TB SSD drive. Three things seem to matter:
- 10 GB of RAM which allows the UTXO set and some indexes to be held in RAM throghout the entire process.
- Enough storage to store the entire blockchain. In order to save long term storage cost ($20 / month for 200 GB), we prune the blockchain to 2 GB. However pruning during the initial download seriously hurts performance (at least a factor two). This is because every time blocks are pruned there’s disk I/O. Worse, the cache is flushed to a few hundred MB, so you’re not taking advantage of RAM. The trick is to download and process the entire chain, then prune and copy the remaining few GB to the regular disk. The SSD drive nicely disappears after you downgrade the machine.
- 8 CPU’s. These don’t really do much until you reach recent blocks; Bitcoin Core skips signature verification for blocks before the last release date. Also apparantly adding more doesn’t help.
Four hours, at a cost of about $4, seems to be about as good as it gets on cloud machines. You might be able to speed it up a bit, without adding trust, by:
- downloading block files from S3 storage instance; if verification fails, the node will just fall back to the P2P network. But who pays for that?
- downloading an already processed database and merely verify it (again, if verification fails, it falls back to downloading and/or processing from scratch)
- split the task in N chunks, one for each machine, e.g. block 0 — 350,000, block 350,000–400,000, block 400,000–450,000, etc. Each node starts with a pre-loaded blockchain synced to the start of their chunk, and then sync to the end of their chunk and then compare checksums. Again, if that fails, fall back to downoading and processing the whole thing.